Updated May 8, 2023
How to Install TensorFlow?
In this install TensorFlow article, we would first get a general overview of TensorFlow and its use in the Data Science ecosystem, and then we would install TensorFlow for Windows.
What is TensorFlow?
TensorFlow is a software application popular for implementing Machine Learning algorithms, particularly neural networks. It was developed by Google and released as an open-source platform in 2015. It’s called TensorFlow because it takes input as multi-dimensional arrays, which are also known as Tensors. We could construct a flowchart of operations that we want to perform on that input, i.e., data goes in at one end and then flows through this operations system and comes out the other end as output.
It is popular because of its extreme versatility. It could be run on different platforms like desktop, or a cloud, or on a mobile device. All of this could be done using a single API. It could be trained on multiple machines, and then we could run it on a different machine. TensorFlow is very fast because it’s written in C++, but it can be accessed and controlled by other languages, mainly Python. Another great feature of TensorFlow is TensorBoard which enables us to monitor graphically and visually its work. Someone interested in Machine Learning, especially neural networks, should learn TensorFlow.
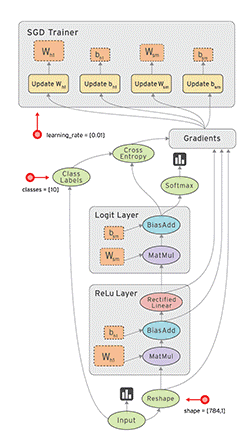
Data Flow Graph Architecture of TensorFlow:
Data Flow graph has two basic units: A Node representing a mathematical operation and an edge that serves a multi-dimensional array known as tensors. So, this high-level abstraction shows how the data flows between operations. Once the graph is created, an inner loop is written to drive computation. Inputs are fed into nodes through variables or placeholders. In TensorFlow, computations are run only after the session is created.
Why is TensorFlow Preferred in Deep Learning?
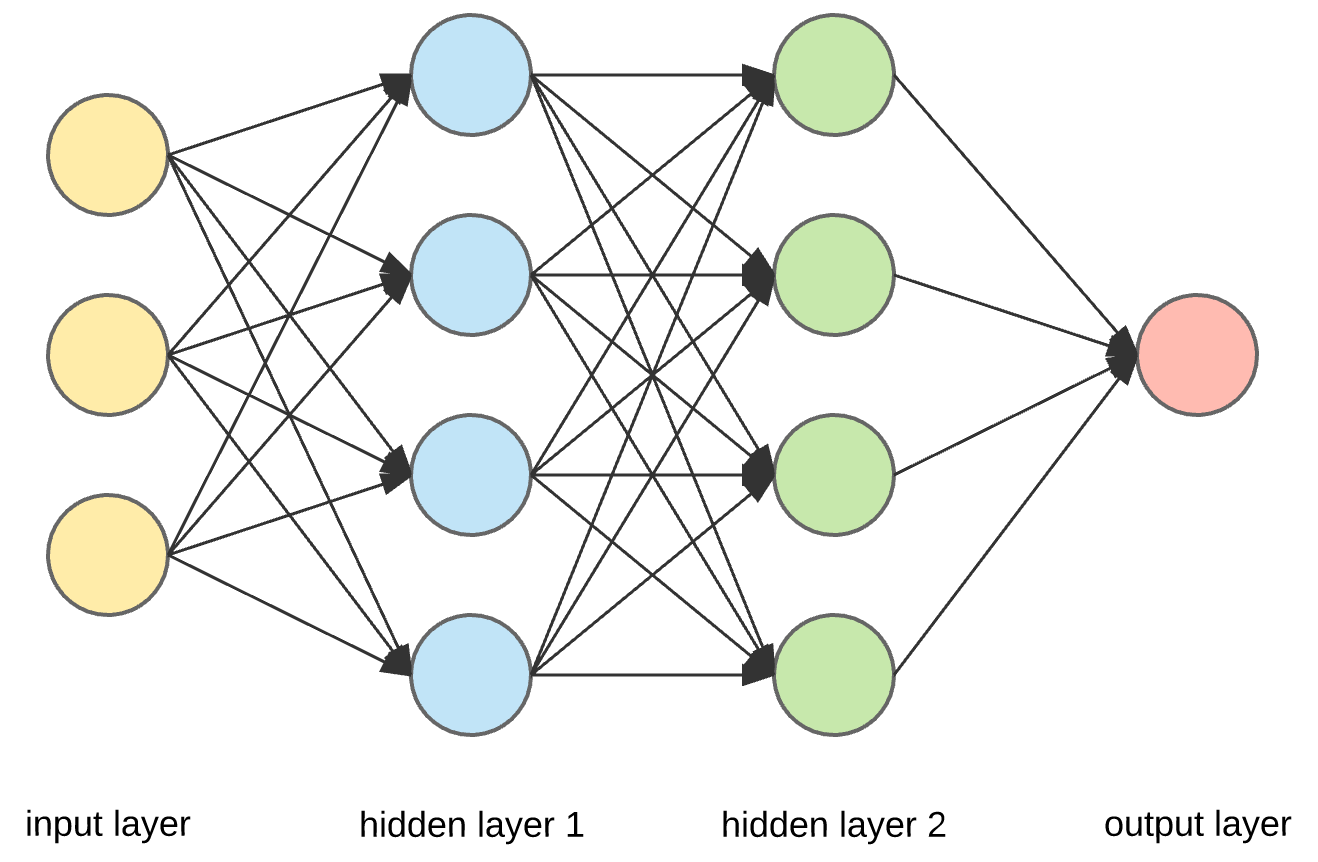
Deep Learning is a part of Machine Learning that learns features and tasks directly from the data. The data could be images, text, or sound. It is often referred to as end-to-end learning. A neural network is synonymous to the neurons in our brains. In the above diagram, data comes from the input layer and flows across hidden layers where all the computations are done and then passes on to the output layer. Multiple hidden players make it a deep neural network, whereas a single layer forms a shallow neural network.
- It has broad built-in support for Deep Learning and neural networks, making it easy to assemble net, assign parameters, and run the training process.
- There are trainable mathematical functions that are useful for neural networks. Any gradient-based machine learning algorithm will benefit from TensorFlow’s auto-differentiation and suite of first-rate optimizers.
- It is compatible with various machine learning due to its extensive collection of flexible tools.
- A Deep Neural Network handles more complex behavior where each input is processed by activation functions like Hyperbolic Tangent, Logistic function, etc. The choice of activation function affects the network’s behavior, and TensorFlow controls the network’s structure.
- It could also be used in building simple Linear and Non-Linear models.
Steps to Install TensorFlow
The installation part will consist of two parts:
- Installing Anaconda
- Setting up TensorFlow using Anaconda Prompt
Part 1: Install Anaconda on Windows
Anaconda is a bundle of some popular python packages and has a package manager called conda (similar to pip). Some of the popular anaconda packages are – NumPy, scipy, Jupiter, nltk, scikit-learn, etc. If you have Python installed in your windows, then to install all these packages, you need to run pip, whereas if you install anaconda, you get all these packages in one shot.
The below steps illustrate how to install Anaconda on windows. Python 3.7 doesn’t support TensorFlow, so that we will use Anaconda for Python 3.6.
- Download Anaconda for Python 3.6 installer from here – https://drive.google.com/open?id=12BLpz3wzsyI0kFcMgv0SGPj__0op-JJs.
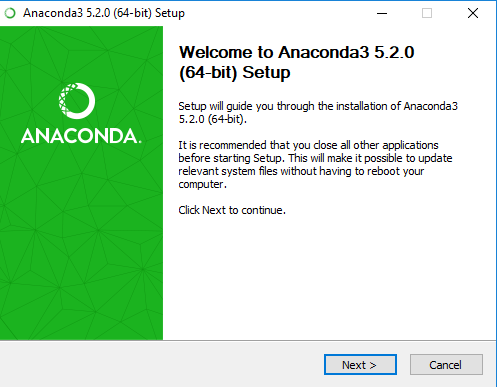
- Once the installer has been download, double-click on it and selects Next.
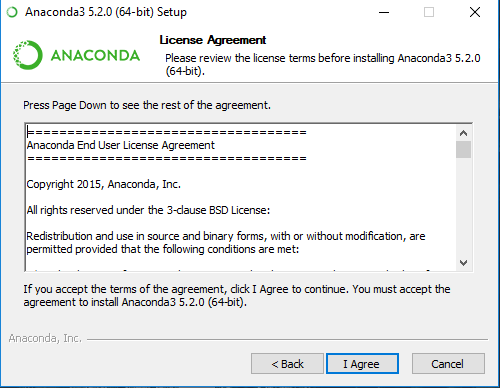
- Click I Agree in the next window.
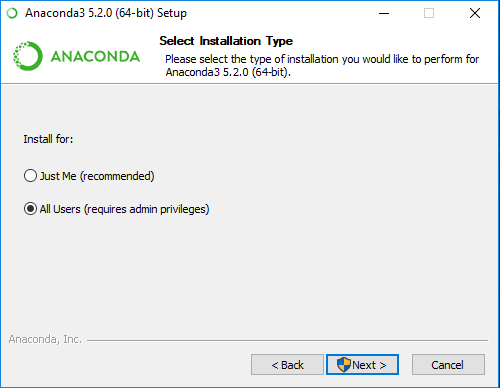
- Select All Users, and click Next.
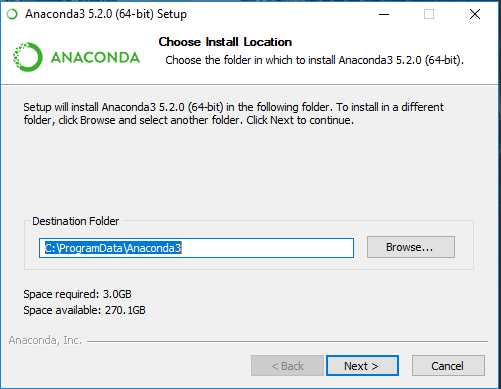
- Choose the Install Location as you deem appropriate and click Next.
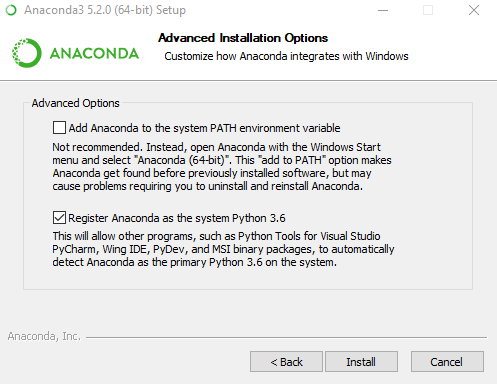
- Check the ‘Register Anaconda as the system Python 3.6’ box and click Install in the next window.
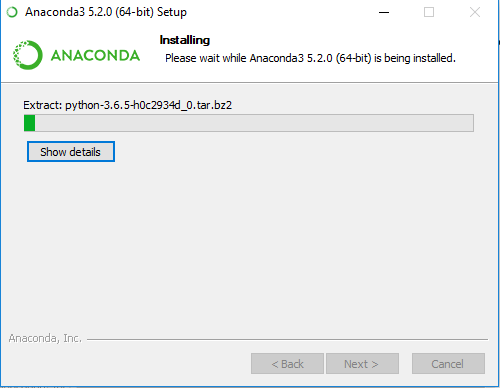
- Installation is in progress.
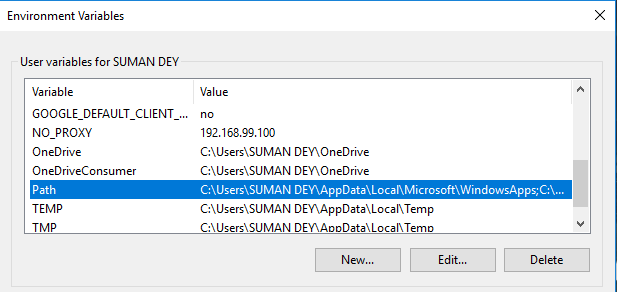
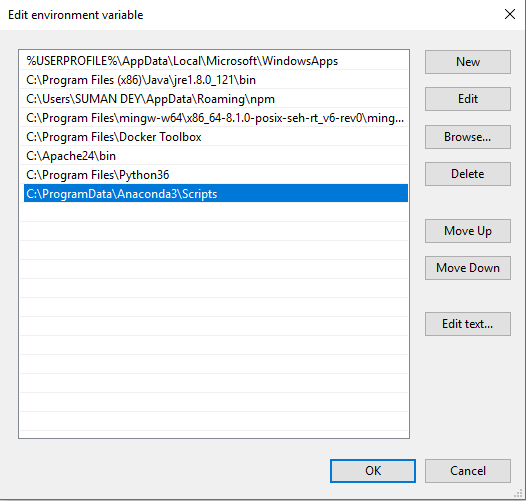
- Let the installation continue, and once finished, click Next to complete it. Then go to Environment variables in windows to set the path.
- Click on New and add the Scripts folder where you have installed Anaconda and click Ok.
- Now, Go to Windows Search Bar and type Anaconda Prompt. Double click the app and type conda –version to confirm its install.
Part 2: Setting up TensorFlow Install using Anaconda Prompt
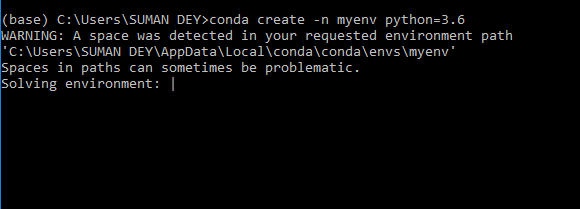
- Go to Anaconda Prompt and type conda create -n myenv python=3.6 and hit enter.
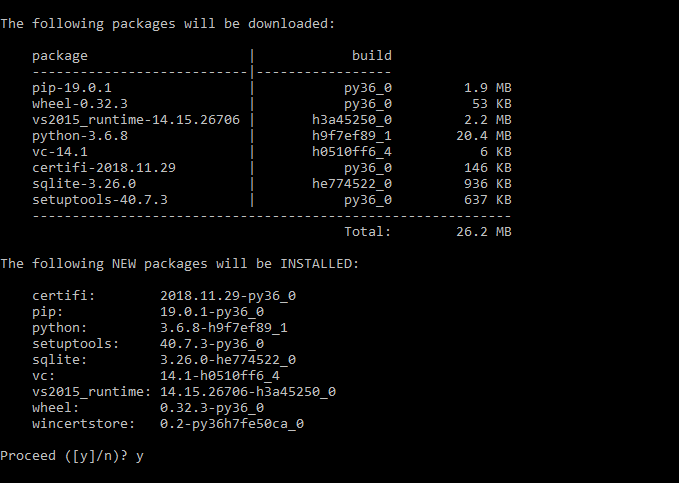
- Press Y and hit Enter. It will create a separate environment to install TensorFlow.
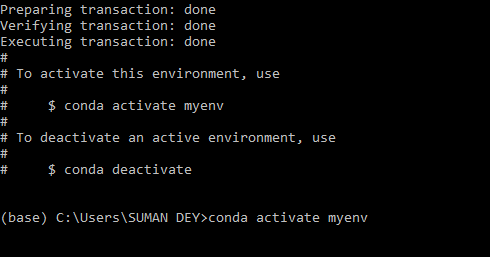
- Type conda activate myenv and enter Enter to go inside the environment.
- Once you are into the environment, enter the following one-by-one
- conda install jupyter
- conda install scipy
- pip install –upgrade TensorFlow
- Once it is done, Type python and then types import TensorFlow. If no error is there, then it is successfully TensorFlow install.
Practical Applications of TensorFlow
Deep Learning has emerged at the heart of nearly every major computational breakthrough in the last few years. It’s already in many of our daily products like Netflix and Amazon’s personalized recommendations, spam filtering, and even our interaction with personal assistants like Apple Siri or Microsoft Cortana.
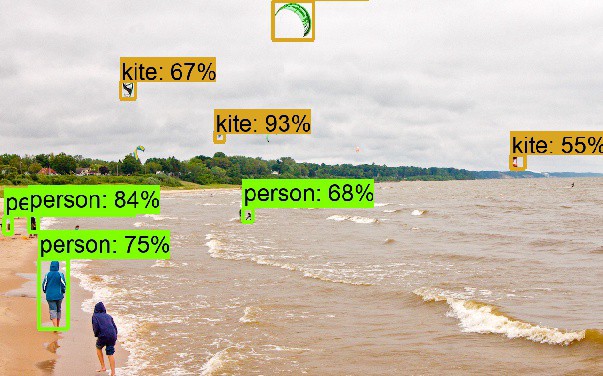
However, it’s not only science applications that are benefitting from this research. People from other disciplines are also starting to explore how deep learning could be used in Object Detection cases (as shown in the image). It teaches the computer to recognize an object in a picture and then use this knowledge to drive new behaviors.
Latest Trends of TensorFlow
It recently released its 1.12.0 version in which few of the major improvements are:
- Keras model could be directly exported to the SavedModel format and used with TensorFlow spring.
- Binaries are built with XLA support, and Keras models could now be evaluated with tf.data.Dataset.
- Ignite Dataset added to contrib/ignite that allows working with Apache Ignite.
Recommended Articles
This has been a guide to How to Install TensorFlow. Here, we have discussed the instructions and different steps to install TensorFlow respectively. You may also look at the following article to learn more –


